|
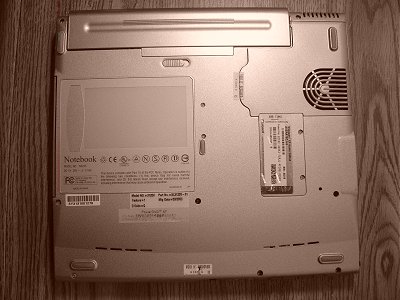
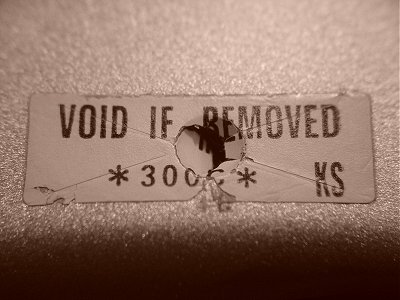
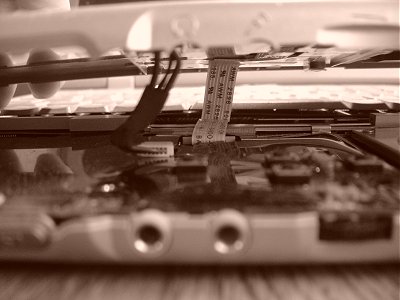
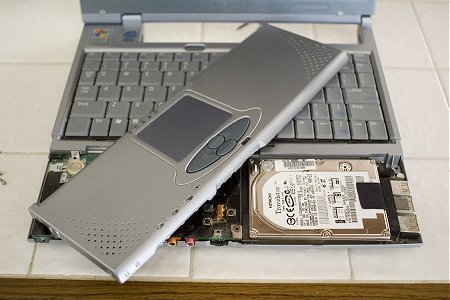
Averatec 3120V Hard Drive ReplacementI've been using the Averatec 3120V notebook for server duty recently. That means I've also been upgrading the parts in this notebook computer to keep it alive and well. To make sure the server has enough space for new data, a large amount of free space must be available at all times. That means the hard drive needs to be replaced with a larger one. The Averatec 3120V is a sub-compact notebook, which means Averatec packed a lot of functionality into a very small space. Therefore, there is special access door to simply pop out the hard drive. However, Averatec did make the process quite simple by hiding the hard drive under the touchpad. To get to it, you have to remove the seven screws on the bottom of the notebook, toward the front (see photo below). Attached Image: Chieh Cheng One of the screws is under the "VOID IF REMOVED" sticker (see photo below). By now, the warranty on my Averatec 3120V is long expired, so I didn't have a problem breaking the seal. I left the sticker on the notebook just for fun. Attached Image: Chieh Cheng After unfastening the seven screws, turn the notebook over and lift the LCD. Make sure you unlatch the lid lock. The lock is hooked to the touchpad, which is now loose. You don't want to pull up the touchpad with the LCD lid. After lifting the lid, carefully lift the touchpad. Don't tug and pull on it. There are two wires running from the touch pad to the notebook (see photo below). Don't break those cables. Attached Image: Chieh Cheng Don't bother disconnecting those cables. You can get to the hard drive simply by rotating the touchpad 45 degrees as shown in the photo below. Tug on the black fabric next to the three USB ports and you can remove the hard drive for replacement. After that, all you have to do is remove the hard drive from the bracket, put another drive into it, and stick it back into the notebook. Assembling the notebook is simply reverse of disassembling it. Attached Image: Chieh Cheng
Did your message disappear? Read the Forums FAQ. Add Comment
TrackBackTrackBack only accepted from WebSite-X Suite web sites. Do not submit TrackBacks from other sites.
No TrackBacks yet. TrackBack can be used to link this thread to your weblog, or link your weblog to this thread. In addition, TrackBack can be used as a form of remote commenting. Rather than posting the comment directly on this thread, you can posts it on your own weblog. Then have your weblog sends a TrackBack ping to the TrackBack URL, so that your post would show up here. Messages, files, and images copyright by respective owners. |
Articles
|
Wiki
112 Users Online 

|
|
Copyright © 2004 - 2024. All Rights Reserved. |
|