
|
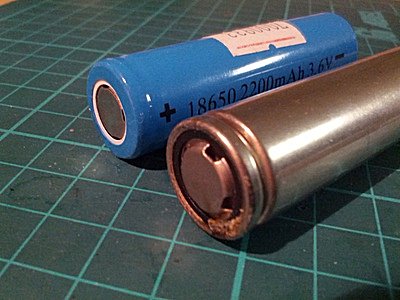
Protecting 18650 Lithium Ion BatteryThe 18650 lithium ion rechargeable battery cells (see photo below) are commonly used inside notebook computers. They are available in both 3.7v and 3.6v versions. Notebook battery packs that uses 3.7v battery cells, most likely, will not work with 3.6v cells. The opposite may or may not be true, but it's not worth find out, because it is possible to damage the notebook with higher voltage. 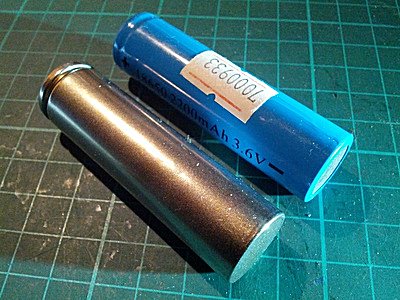
When lithium ion batteries discharges past a certain threshold, there is a chance for them to catch fire or explode. Therefore, notebook battery packs contains circuits to cut off discharge prior to the threshold. Bare 18650 battery cells are available with or without the protection circuit. If you purchase individual cells to rebuild notebook battery packs, then you want the unprotected version. However, if you have other purposes, then you may want the protected version. The only difference between the two is the extra protective circuit board mounted on the battery cell. If you have some unprotected 18650 battery cells, but you want to use them individually, then you should protect them. This article shows you how to turn unprotected 18650 battery cells into protected 18650 battery cells. Protection CircuitIndividual 18650 protection circuit is available on the Internet. You just have to look around a bit. It looks like the photo below. 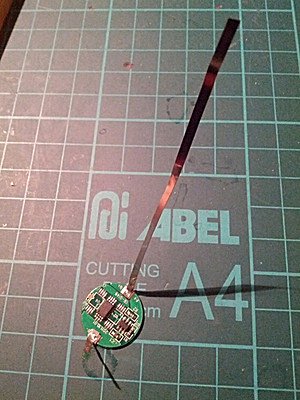
The way it works is that the short lead attaches to the bottom of the 18650 battery (negative). The longer lead attaches to the top of the battery (positive). It monitors voltage and cuts off the discharge at a certain threshold. The bottom of the circuit board replaces the bottom contact of the battery. I do not know for sure, but my guess is that the protection circuit will drain the 18650 lithium ion battery slightly over time. So protected 18650 lithium batteries should have a faster self-discharge. ToolsIn order to solder the protection circuit, you'll need a soldering iron. For battery work, you'll want a 40-watt soldering iron. The battery is like a big heat sink, smaller wattage soldering iron won't be able to heat it up quickly enough to solder. The Weller SP40L soldering iron is a good candidate for this job. It has a flat tip that increases heat transfer. It provides 40-watt of power and solders the protection circuit to the 18650 battery easily without damaging the circuit board. 
You'll also need some solder. I stick to 60/40 Rosin Core solder for all my basic electronic needs. Insulation tape is mandatory as well. You can use black electric tape. In this article, I simply used some transparent packing tape. PreparationFor most 18650 battery cells, you won't need to do much preparation before you start. But it's worthwhile to make sure your battery cells are sufficiently prepared. Noticed that the entire battery cell body is one piece metal that is connected to the negative terminal. In the photo below, you can see the only insulation between the positive terminal and the metal body is a black plastic o-ring. Therefore, all 18650 batteries should be wrapped and insulated to prevent shorts with surrounding components. 
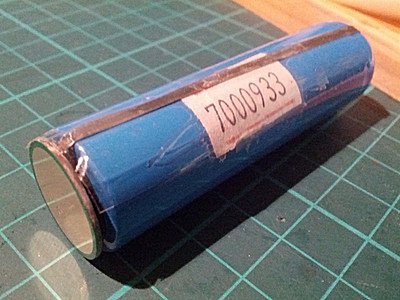
If you have any 18650 batteries that does not have outer insulated wrapping, it's time to use some insulation tape to provide an outer wrap. AssemblyWith your heated soldering iron, solder the short lead to the bottom of the battery (shown in the photo below). Be careful that the circuit board is fixated next to the battery and component upward. It will be folded over after soldering. Use the flat tip to heat both the short lead and the negative battery terminal at the same time. Apply solder and let it flow onto both the lead and the battery terminal. 
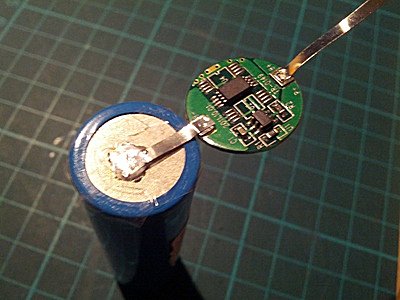
After soldering the lead to the battery terminal, use insulation tape to cover the lead. This will prevent possible shorts between the soldered lead and the circuit board components. In the photo above, a clear insulation has been taped to the bottom of the battery. Next, fold the circuit board over and run the longer lead over to the top of the battery pack (see photo below). You can see the bottom of the circuit board is the round negative terminal. Use insulation tape to fix the long lead to the side of the battery and prevent shorts to other components. The insulation tape also holds the lead in place for easy soldering in the next step. 
Apply the flat soldering tip to the long lead and the positive terminal at the same time. Flow solder onto both when they are sufficiently heated. 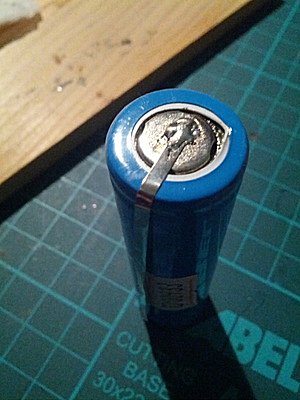
After soldering the protective circuit onto the battery, it's ready for use. You can use a volt meter to determine that the battery still provides the correct voltage to ensure no shorts nor damage. Related Links
Attachments
|
Articles
|
Wiki
237 Users Online
Get Our

|
|
Copyright © 2004 - 2025. All Rights Reserved. |
|


