
|
Replacing the Keyboard on the HP Pavilion dv6-3050us Entertainment Notebook
Earlier this year, I took apart the HP Pavilion dv6-3050us Entertainment Notebook to replace its CPU fan and clean out its heat sinks. But I accidentally spilled rubbing alcohol on the keyboard. Its keyboard had never worked quite right every since. I didn't realize how inexpensive a replacement keyboard was until I looked it up this week. For $15, replacing it was no brainer. And doing it and realizing how easy it was, I should have bought the replacement right off the bat. In this article, I'll show you what replacement keyboard to purchase and how to replace it. Parts You NeedThe only part you'll need is the replacement keyboard. It is available on Amazon for $15, which includes shipping (see "Related Links" section below). This part is exactly the same as the one on the DV6-3050US. 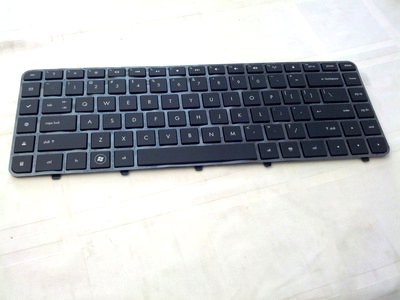
The following photo shows the old keyboard part numbers (in case you are interested). The HP part number is 597635-001. I suspect you'll pay an arm and a leg for it at HP. The Quanta part number is AELX6U00210, while the Darfon part number is 9Z.N4CUQ.001. 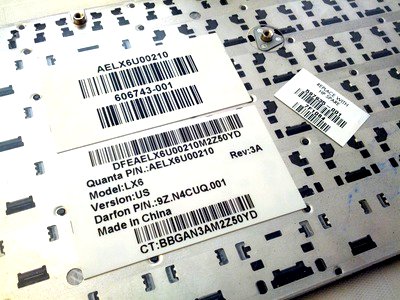
The following photo shows the new keyboard part number (in case you are interested). The Quanta part number is the same. But it has a Lite-On part number of SG-35500-XUA. It's missing the HP part number. 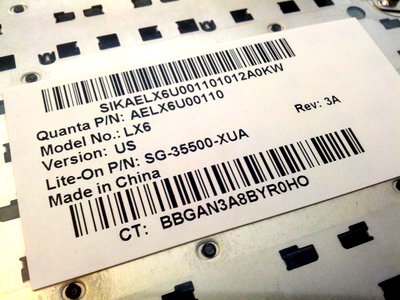
Tools You NeedThe only tools you'll need is a Phillips and a flat-head precision screwdriver. You'll need the Phillips screwdriver to unscrew the keyboard. You may need the flat-head screwdrive to do a little prying (I used my fingernails). Replacing the KeyboardIf you look at the bottom of the new keyboard (see photo below), you'll see a number of screw holes. You'll need to find those screw holes on the notebook computer. And I'll show you how. 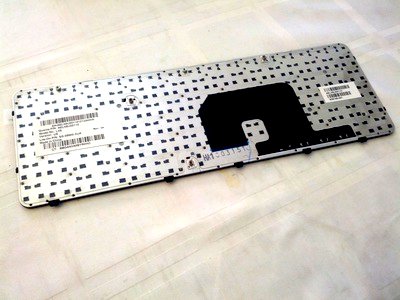
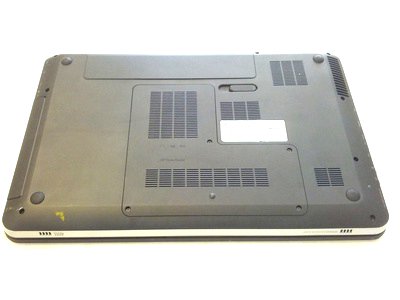
Remove the battery and the component cover (see photo below). Use the Phillips precision screwdriver to loosen the component cover and pop it off. 
After popping off the component cover, you'll reveal many more screws. 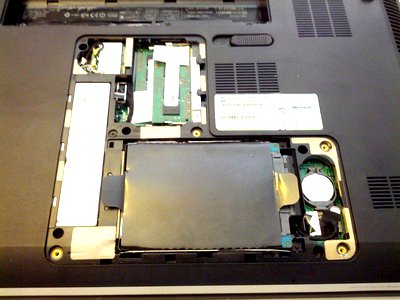
Find all the keyboard screws. They are identified by the keyboard symbol (see photo below). There are five screws. You can use the bottom of the new keyboard to help you locate all five screws. 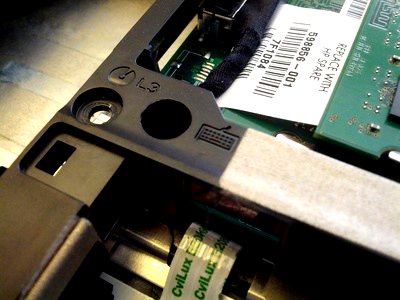
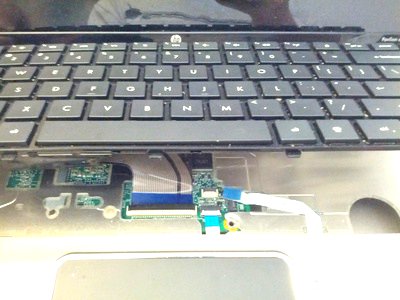
After unscrewing all five screws, turn the notebook over and open the list. Now it's time to pop off the old keyboard. If you look at the tabs on the new keyboard, you'll see that they surround the side and bottom of the keyboard. Therefore, the top of the keyboard is the pry point. I used my fingernails to pry the old keyboard up to prevent damaging the surrounding. It doesn't take very much force, but if you rather save your fingernail, then use a flat-head precision screwdriver to do the dirty work. After prying the keyboard up, don't move it too far and tug too hard. It's still attached to the circuit board (see photo below). You don't want to break anything. 
Pull up the ribbon cable fastener for the keyboard to loosen its hold on the ribbon cable. Then slide the ribbon cable out and remove the old keyboard. Install the new keyboard and assemble the notebook in reverse. The new keyboard has worked right off the bat after I reassembled the notebook. Good luck to you and have fun. Related Links
Attachments
|
Articles
|
Wiki
120 Users Online
Get Our

|
|
Copyright © 2004 - 2025. All Rights Reserved. |
|


